HondoMan
New Member
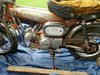
Hi All, I caught the restoration bug this past July and managed to score a "barn find" 1975 ST90 for my first restoration project. I had not done a restoration previously, but I am a relatively handy and thought I would give it a try. I want to take the opportunity to share my experience for anyone that might be considering a similar project.
First of all, I now understand that I was very lucky with the ST90 that I purchased. Although really faded and dirty, most of the bike was "there" and in relatively decent shape with little rust. When I made the purchase , the seller also threw in a 1974 CT90 "parts bike". I was not very interested in the CT90, but I came to appreciate that there are a lot of common parts on the Ct90 that I was able to cannabalize for the St90. This saved me a lot of trouble and expense in several cases.
Once I got the ST90 home, I stripped it, piece by piece, being careful to photograph each part of the bike prior to disassembly and bagging and labeling all of the fasteners and bits and pieces by component. The rear axle was frozen solid into the swing arm and wheel, so I had to take it to a local machine shop to press it out. Prior to taking part to the machine shop I damaged the axle castellated nut while trying to bang the axle out of the swing arm - this was dumb of me, but lesson learned. I also managed to damage the shoulder bolt that attaches the kick stand to the kickstand bracket. I did not know that the shoulder bolt was threaded into the bracket clevis and again tried to bang it out damaging the bolt threads - another novice mistake - fortunately the CT90 kickstand provided me a replacement shoulder bolt.
Apart from these two incidents, most of the rest of the bike came apart fairly easily with the help of a lot of PB Blaster. Once disassembled I set to cleaning all of the parts. I mainly used scotch-bright, wire brushes and pure household vinegar. I found vinegar to be an excellent cleaning and de-rusting agent. I would drop a batch of parts in vinegar at night and clean them with a wire brush the next day. For the front and rear fender inner surfaces, which were very rusty, I pooled the vinegar in the rusty areas spot by spot, wire brushed them and then primed and painted the cleaned inner surface. The result was very good.
The handle bar controls on the bike were in very bad shape. I was initially afraid to disassemble them as there are a lot of little bits and tiny springs, but ultimately I had no choice. I was finally able to make one set of fully functioning controls with parts from the ST90 and CT90 handlebar sets (since they are identical). This process included completely disassembling the wire bundles so that I could replace individual damaged wires. The turn signal switch slider was particularly challenging due to its tiny springs and ball bearings. To reinstall it after removal, I ended up having to make an insertion tool from a piece of sheet metal. Using the tool I was able to assemble all of the slider bits and insert the assembly back into the control housing. This required a lot of patience. Once the controls were complete I sprayed painted the finished exterior body's with black low gloss paint.
I decided to replace the standard ST90 knobby tires with street tires, since I did not intend to do much trail riding. No one makes a 14 inch tubed street tire, so I purchased 14 inch tubeless scooter tires and installed them with a tube inside. Determining the tire sizes was challenging, but I ended up putting a 100/90-14 on the rear and a 80/90-14 on the front. I could probably have gotten away with one size wider on the front.
For the frame and headlight body paint, I purchased candy topaz orange aerosol paint from Marble Motors on ebay. This was a 200 dollar investment (2 cans base, 3 cans orange, and 1 can clear) but it was absolutely worth it and the paint turned out fantastic. I did find that I could paint the frame with it laying on its side - one half at a time. This really helped to avoid paint runs. Once the paint was done, I let it cure for 3 days and then wet sanded the horn and sides with 2000 grit and then polished it with Meguires Swirl remover 2.0 (#3 cut) . This made for a smooth surface for the "Honda" emblem on the horn. The decal would not have looked good over an unfinished "orange peel" surface.
The wiring on the bike was a big challenge and also required a lot of patience. I struggled with it for quite a while before finally finding the wiring diagram on the internet. Even with the wiring diagram the wiring was challenging as there were a number of damaged and frayed wires. Also - many of the wire colors had faded and it was difficult to match them to the wiring diagram.
For the engine, I did the major cleaning with Simple Green and a wire brush and the final clean with acetone. It took several days of on and off work to get the engine looking good. Once clean I repainted the engine side covers in Honda silver cloud and polished the magneto and points covers. Prior to polishing the magneto cover I sprayed the inset "Honda" and "Made in Japan" black and then removed the overspray during the polishing. Very good result. For the cylinder head, I did a light dusting of high temp silver paint. I debated painting the head or leaving it bare - but it was in really poor cosmetic condition.
The turn signals on the bike were all missing, however there are a lot of replacement Honda signals available on ebay. Honda turn signals are a common part for most all mid-1970's bikes. Make sure to buy 6 volt signals. The 12 volt signals are almost identical, but you cant find the correct wattage bulb for them. Without the correct wattage, the turn signal relay does not function correctly to make the system blink.
One thing I was not able to find were the turn signal mounts for the handle bars. As an alternate, I installed the turn signals on stems off of the headlight bucket. This is the ST90 "Dax" style and similar installation to the CL200. If and when I can find the right handle bar signal mounts it is an easy move to put them up on the handle bars.
Dis-assmbly of the rear shocks was also a challenge, as I did not have a spring compressor. In the end I just used 4 vice grips and compressing portions of the spring bit by bit until the spring was short enough that I could screw the end cap off. This was not an elegant solution, but it is a very effective way to get the job done.
Everything else was pretty straight-forward. I ended up spending right at about 1000 dollars total on parts and paints. I have attached my itemized purchase list along with start to finish photos and the wiring diagram at the following link if anyone is interested.
There are very useful exploded view diagrams availabe at the following link. These are very handy if you have parts missing from your bike or if you cant recall how to put something back together.
https://www.cmsnl.com/honda-st90_model738/partslist/
My total time for the restoration project was 3 months. I usually spent at least an hour or so every day doing something or other on the bike.
My final challenge was getting the engine to run after its 30 year nap. Although in generally good apparent condition, the motor was very stubborn to wake up and seemed to have very low compression. I was just about to tear the head and cylinder down when I read a note on a blog about injecting a bit of motor oil into the cylinder (through spark plug hole) to boost the compression.This worked like magic and the motor immediately had noticeably higher compression and popped right off after a few kicks. Great tip to keep in mind.
Thanks to the Lil Honda members that provided advice to me along the way! Also, I highly recommend DrAtv for parts. Everything that I purchased from them was exactly right, delivered quickly and reasonably priced.
The following link has a selection of photos that I took along the way.
https://www.flickr.com/gp/140778798@N04/Y3Li41
Purchased Items:
Item Cost ($)
Barn Find Bike 300
Air Filter Box Assy 70
Rear Inner tube 15
Front Inner tube 15
Spoke 14
Key 10
Carburetor 50
Wheel Bearings 20
Various Paints/Primer 100
Wheel Sprocket Studs 20
Front Tire (Street) 50
Handlebar Grips 8
Frame Grommet 7
Decal Set 50
Topaz Orange Paint 180
Fork Oil 10
Chain 16
Battery 10
Clutch Cover Gasket 8
Turn Signals and bulbs 60
Seat with Pan 110
Back Tire (Street) 55
Brake Cable 15
Speedometer Cable 20
Headlight 48
Throttle cable 20
Mirrors 26
Total : 1307
 Will post pics etc when its near enough done.