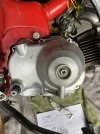
1982 CT 110 purchase/Full Monty Rehab 2.0

It did have the aux seat on the luggage rack but having met the owner and spending about an hour conversing with him and being shown some of his work on automobiles that he had on site and his general demeanor, I’m not surprised by the clutch. His “two up” was just him being rather well fed. His mechanical habits were a bit surprising considering he told me numerous times he was a “trained Engineer”. I watched somewhat in amazement as he used a socket wrench to rethread a metric bolt hole with an SAE bolt as part of the inspection cover plate on a fuel tank that he was complaining about fuel leaking from it. The fuel tank was located inside the vehicle, an OHV, about 12” behind his seat. Numerous red lights started flashing the more I listened and watched. I suspect he might have been resting his feet on the shifter lever rather than the foot pegs and causing some slippage due to the bluing of the steel plates and combined with his lack of knowledge as to the required oil for a wet clutch plus the steel disc being not on the correct order. Not complaining at all because I bought it with my eyes wide open and it is exactly what I was looking for, a project.

All of that sounds like it was conspiring against that clutch. I've seen lots of people who don't think about thier foot placement and experience slipping.

Also as someone who was a motorcycle mechanic first and went to school for engineering second; most engineers don't even know the difference between types of bolts or that a pipe wrench does anything differently than a crescent wrench. Many, if not most have never even used a ratchet.

To a Civil engineer a bolt and nut is a "fastened joint", to a Mechanical engineer it's a yield strength to test stresses against, and to a metallurgical engineer it's a chemical composition leading to a crystal structure. At no point does it cross their mind that someone will have to put it together or the challenges associated with doing so.

I don't think this was as big of a problem in decades past, but I think as a society we have moved more and more towards extreme specialization.

So many problems arise from the disconnect between engineers and technicians, i feel like i could write a whole damn book on the subject.

All that is to say I'm not surprised, my friends who are self proclaimed "engineers" are some of the least worldly, out of touch, and skill-less people i know. Not to say they're bad people, and they certainly don't intend for this to be the case. It's just that college teaches them that being able to solve for the position of an electron in a semiconductor is more important than knowing how to turn a wrench or grease a joint.

It's also not to say the problem doesn't go the other way, we all know dozens of people in vocational positions that would rather throw parts and money at a problem they refuse to understand on a conceptual level and diagnose properly.

Sorry to rant on your thread, engineers being bad at mechanics just lands a little close to home i guess 😅
 
Sounds like you're on the path to recovery .

It's interesting how many higher studied fields have so little actual mechanical aptitude .

This is most glaring in Machinist's personal vehicles like the boob you watched damage a threaded device .

It's why I don't like anyone else touching my things, they're almost guaranteed to screw something up IMO .
 
Moving forward, albeit slowly. I ordered the B and C clutch plates from an EBayer in state and new clutch springs from DrATv. Early next week they should be here and I can finish the clutch side assembly. I will skip ahead a bit today and open up the left side case for inspection and replacement of the 15T sprocket which will allow for the new chain install and completion of the rear wheel assembly. Planned process after that is clutch install and functional testing then timing check and valves if needed. Based on my short ride in the woods and trail roads I doubt timing or valves are too far off but my enthusiasm is not an accurate measurement of Honda specifications. Then out the door and into our Winter snow/mud fest under mostly blue skies.
 
Need a little help, or maybe a lot. I am using the Honda Shop manual for clutch steel plate thickness specs and it shows on page 63 the discs should be (new) between 1.93-2.07 mm with a service limit of 1.85mm. The plate A that I removed was 2.0mm. Plate B was 1.57mm. Plate C was 1.56mm. Plate D was 1.94mm. Plates A and D are above service limits and I am reusing.
Plates B and C are below the service limits so I ordered a new set of OEM(per E Bay ad) steel discs. I measured them upon opening and amazingly they are within .02mm of the old ones! I've checked and rechecked, taken a break and then rechecked the measurements, my logic, and the shop manual.
Here is my conclusion: at some point the B and C steel plates were replaced and installed in the incorrect positions. They were replaced with similar plates that I bought as OEM new. (Whether they are actually OEM or not I can't say at this point) They may have caused some of the slipping I was experiencing and got scuffed and blued in the process.
Plate B # 22321-046-010 has been superseded by 22321-046-020
Plate C # 22321-046-000 does not show any replacement. So theoretically I have the current parts.
Have the specs changed and I'm using old information or just looking in the wrong spot? Are the current "Heavy Duty Springs" having to compensate for the thinner discs? I can actually feel a weight difference between the thicker old plates and the new thinner ones. Sort of frustrating having waited a week for replacements that are the same dimension thickness at the ones I pulled out and both are below the service limits of the manual.
Pile on and pummel me with the truth or just lie to me and cheer me up.
 
I'd have just replaced the fiber discs, scuffed the steel discs, and upgraded the springs and have been done.

Wear limits or not, old discs are just...old. And if your in there already why go in a second time.
 
? Did you remember to soak the new friction discs in fresh motor oil overnight ? .

This is critical .

Once the steel driven plates are blue they're pretty much shot, I'd not re use them .
 
I'd have just replaced the fiber discs, scuffed the steel discs, and upgraded the springs and have been done.

Wear limits or not, old discs are just...old. And if your in there already why go in a second time.
I may do a fiber replacement, but my present issue is the new steel are the same thickness as the used ones. The question I'm trying to answer is did the specs change from 1.93mm- 2.07 mm to a new spec of 1.57mm for the steel discs? Likewise what's the current spec for fibers and where might this new spec be published? Or was it just the equivalent of a TSB to Honda Techs & Dealers? Upgraded springs are a day away from here according to USPS and DrAtv. Are these "new upgraded springs" a remedy for the thinner discs? Thanks for the input.
 
I'd have just replaced the fiber discs, scuffed the steel discs, and upgraded the springs and have been done.

Wear limits or not, old discs are just...old. And if your in there already why go in a second time.

? Did you remember to soak the new friction discs in fresh motor oil overnight ? .

This is critical .

Once the steel driven plates are blue they're pretty much shot, I'd not re use them .
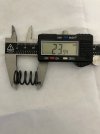
Soaking already. Plate B and C steels are blued a bit and scuffed but the same thickness at the new OEM ones. The color blue gets my attention and merits an analysis but did they wear down due to friction and get blue due to heat or are they close to the original thickness and the bluing was caused by a previous set of worn fiber discs. Springs are woefully short, new ones are on the way; nominal is Max 27.0 mm and minimum is 26.0mm, current are an average of 24.04. The fibers are about 97% of the original depth but only a very small percentage above service limit. I don't think they are original because the plates B and C were in the wrong order. Not likely from the factory but likely the result of a fiber disc exchange. First I need to decide if there is a problem, second I need to identify clearly the problem, then I can work on a solution. Will the new springs cover for the thinner discs? Makes me wonder about the posts detailing new parts but slippage still being present. This feels like a more in depth project that it did a few days ago. I'm having CT 90 flashbacks from a last year, mechanical this time rather than electrical as in 2025.
 
It's not just you it seems: https://www.tapatalk.com/groups/hondatrailcts/clutch-plate-thickness-question-new-plates-t7241.html


Also this ebay ad for a disk advertises 1.6mm

Seems to me individual plates are different thicknesses even if not called out in the manual.

Also i would think the steel wouldn't wear down so much as the friction disks, so long as there's still friction material to be shead.

I'd say run it. Crazy about the springs.

Thanks a bunch for your time and effort. I, too, late last night found the same article and a few more references to the thinner plates as OEM from as far back as 13 years ago. I am relieved to have that confirmed by you. New fibers, new springs, new B and C plates. Onward and upward we go. Two weeks of clutch piddling around is plenty.
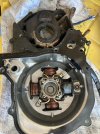
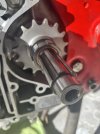
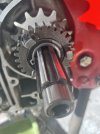
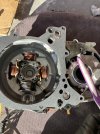
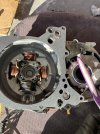
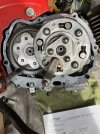
On the stator side yesterday I opened it up and began to replace the original15T sprocket with a new DrAtv. The old one showed some wear comparable to the rear and chain. IMG_5973.jpeg. IMG_5972.jpegIMG_5974.jpegIMG_5971.jpeg
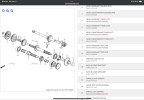
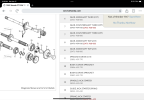
A new shift lever seal and drive shaft seal are needed. One other item I noticed different from the manual is the drive sprocket should have a collar/ bushing on either side per the parts schematics. (Items 10 & 11 with separate parts #)IMG_2913.png. The one I removed only had a bushing on the interior side as I show in the picture. The new sprocket has a full length bushing inside the sprocket without any type of collar but it is from DrAtv so I am curious that this might be another updated part like the clutch plates. Anybody take a guess or know about this difference?
 
I have a new corollary to an old adage I’d like to share with you. Its original premise was “Ignorance is Bliss but Knowledge is Power”. Cute, but it hardly covers some aspects of working on a ‘82 CT 110 so I’m going to try to add some value. I theorize the following: Ignorance is Bliss, Knowledge is Power, and owning a Micrometer can cause Angst. The specs on the original clutch discs ( steel and fiber) and springs are all readily available plus the service limit on thickness or length. Some of my steel discs and springs were beneath these limits per my brand new micrometer and I ordered new ones. Upon arrival they all measured beneath the service limits listed in the Honda shop manual. Damn. I get a little aggravated because this is going to cause another week of delay until I can sort this out. Lo and behold ( and with a big help from Mikerts Garage)
It's not just you it seems: https://www.tapatalk.com/groups/hondatrailcts/clutch-plate-thickness-question-new-plates-t7241.html


Also this ebay ad for a disk advertises 1.6mm

Seems to me individual plates are different thicknesses even if not called out in the manual.


Also i would think the steel wouldn't wear down so much as the friction disks, so long as there's still friction material to be shead.

I'd say run it. Crazy about the springs.
Seems the specs maybe got changed years ago. Fine. I also ordered new springs and you guessed it, they too are way below the manual service limits of (26 mm) and shorter than the ones I was replacing.
IMG_2914.png. IMG_5984.jpeg. IMG_5985.jpeg
The 21 mm are the new ones from a well respected outfit in Nebraska and I’m pretty sure they know better than I what is the correct part for this project. The ones I removed were apparently a replacement for the original and these are an improved “heavy duty” substitutes. I’m done with the newbie micrometer owner enthusiasm crap and the associated angst it generates. My new mantra is “unwrap and install”.
 
The new clutch springs from DrAtv arrived yesterday but the new fiber discs are still a few days out but I decided to just practice an assembly with what parts, old and new, that I had cluttering up my 8sq ft work table. Space is at a premium in my garage with two bikes against the wall.
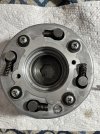
IMG_5986.jpeg IMG_5988.jpeg All went together easily and with only one misstep on the long spring/short spring disc placement. Glad I did a dry run and saw what I had done even with the manual. The oil seal kit arrived today which allowed me to start putting the counter sprocket with its new oil seal and once that was in place I decided to pull it off and try fitting the lower gear set of the sub trans onto the new counter shaft. Oiled both counter and the lower gear and attempted to slide one onto the other. The new counter gear was reluctant to slide into the sub gear but I was able to align them perfectly and tapped them with the handle end of a screwdriver and they did move about 1/16”. But that’s all I could get so I tapped them very gently with a plastic hammer and each tap got another 1/16” til they slid up snug. Couldn’t budge them apart at all with my hands which was quite different from the old disassembled parts. Then I realized that is was going to be a problem because the counter sprocket needs to be mounted on the drive shaft then the left side stator cover is mounted before the sub tranny assembly is begun. The counter sprocket and its captive sub gear are now in the freezer for twelve hours in hopes that it may give me some maneuverability when I take the heat gun to them in the morning. I’m thinking of setting them in an ice bath with the sprocket on the bottom and the sub gear out of the water and them judiciously apply some heat to it. I’ve got access to to a neighbor with possibly a small hand press or other equipment to make this happen. He is a very fastidious engineer type and will do nothing to harm either part plus I get a tour of his latest projects. Always something good happening that very well equipped shop. Any body got an idea I am all ears.
IMG_5989.jpeg IMG_5990.jpeg The new oil seal and sprocket in a very cleaned up new home. Second shot was supposed to be a dry fit install and then the realization that the left side case needed to between the two parts.
 
Last edited:
If the parts are already together; I've always had the best luck with a MAP gas torch and an ice cube. I feel you can get the best localized heat transfer that way. They key is timing. You only want to do the ice for 45 seconds or so (after doing the torch for minutes) then try to get that sucker off as fast as possible. Your main battle is how fast heat transfers between pressure fit metal parts, it doesn't hold a temperature differential long at all.
 
Thanks for the tip. Fortunately my neighbor has the skills and tools to tackle such projects and save me from my errant ways. He’s a former machinist in the Aerospace Industry and his garage shop is equipped accordingly.
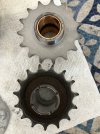
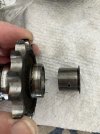
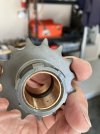
IMG_5994.jpeg He asked some questions and began to solve the problems that he found with the new counter sprocket. After using his pre to separate the two pieces he quickly noted the poor quality workmanship on the new sprocket compared to the Honda original.
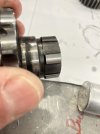
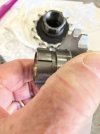
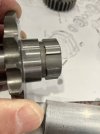
IMG_5996.jpeg IMG_5997.jpeg IMG_5995.jpegNotice the difference in machining quality in the two items. The Honda on the left and the two non OEM pictures on the right. Even the bronze bushing inside had manufacturing defects. He spent about two hours trying to improve the fit and finish for me and succeeded in doing so. It won’t slide on like the two original Honda pieces matched but trying to put a dress on a pig is always going to be a challenge. Hope to get the left side back together today along with finishing the chain/rear wheel package. Did a quick look at the front forks by scissoring the boots off and they are a mess. Probably going to buy new shock assemblies and rebuild the current ones at some later date. Trying to fit replacement parts of sometimes questionable quality into 40 year old OEM components isn’t something I am inclined or equipped to attempt. Rehab is my goal, not restoration.
 
Thanks for the tip. Fortunately my neighbor has the skills and tools to tackle such projects and save me from my errant ways. He’s a former machinist in the Aerospace Industry and his garage shop is equipped accordingly.
View attachment 86575 He asked some questions and began to solve the problems that he found with the new counter sprocket. After using his pre to separate the two pieces he quickly noted the poor quality workmanship on the new sprocket compared to the Honda original.
View attachment 86573 View attachment 86572 View attachment 86574Notice the difference in machining quality in the two items. The Honda on the left and the two non OEM pictures on the right. Even the bronze bushing inside had manufacturing defects. He spent about two hours trying to improve the fit and finish for me and succeeded in doing so. It won’t slide on like the two original Honda pieces matched but trying to put a dress on a pig is always going to be a challenge. Hope to get the left side back together today along with finishing the chain/rear wheel package. Did a quick look at the front forks by scissoring the boots off and they are a mess. Probably going to buy new shock assemblies and rebuild the current ones at some later date. Trying to fit replacement parts of sometimes questionable quality into 40 year old OEM components isn’t something I am inclined or equipped to attempt. Rehab is my goal, not restoration.
Very nice work. I've had similar problems with my 69' CL125, had to carefully file the inside spines of the new sprocket for an hour before it'd fit.

If you do buy new forks (I think that's what you meant?) I will be exceeding curious to see what you think of them. And how they compare design wise to the originals. There is almost no information online about the various replacement CT90 and CT110 forks
 
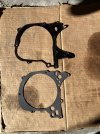
The CT 110 gasket kit I got early in is giving me pause after some of the parts I’ve ordered. Pretty sure this can off Amazon months ago. IMG_5998.jpeg IMG_5999.jpeg IMG_6001.jpeg IMG_6002.jpeg
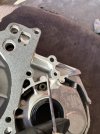
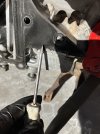
First photo is the old black gasket on top and grey replacement on bottom. 2nd is the new gasket installed and the pointer is the area missing from this gasket. Third is the old gasket and the area covered with the pointer. 4th pic is with both gaskets installed , the old black one on bottom covering the triangular area and the new gray sitting on top not covering the triangular area. Is this an adequate or updated gasket? The only oil I could see that might end up in that area was from a small drain hole in the aux trans box just to the left of the HI-Lo selector stem.
Yea or Nay on using the new grey gasket? Thanks for any help or just viewing.
 

Attachments

  • IMG_6002.jpeg
    IMG_6002.jpeg
    2.6 MB · Views: 32
The CT 110 gasket kit I got early in is giving me pause after some of the parts I’ve ordered. Pretty sure this can off Amazon months ago. View attachment 86580 View attachment 86581 View attachment 86582 View attachment 86586
First photo is the old black gasket on top and grey replacement on bottom. 2nd is the new gasket installed and the pointer is the area missing from this gasket. Third is the old gasket and the area covered with the pointer. 4th pic is with both gaskets installed , the old black one on bottom covering the triangular area and the new gray sitting on top not covering the triangular area. Is this an adequate or updated gasket? The only oil I could see that might end up in that area was from a small drain hole in the aux trans box just to the left of the HI-Lo selector stem.
Yea or Nay on using the new grey gasket? Thanks for any help or just viewing.

This happened to me when i was repairing my stator. That gasket you got is for a early early CT90 without the transfer box. I don't know why they put that in every kit under the sun, it's very annoying. I found out the hard way it does not work and will cause a very fast leak. You could do the right thing and buy the right gasket, or you can cut that part off the old gasket and hold it in place with a dab of gasket maker. I have done both with success.
 
As an eBay Associate we earn from qualifying purchases.
Thanks for the heads up and the link. I’ll purchase the whole gasket kit but do my homework more thoroughly this time. However, some of my learning comes from my mistakes, so even though I can return the part to Amazon I get to keep the knowledge I’ve gained in the process. Pretty good deal.
 
Whew. Saturdays are nothing special when you’re in that stage of life where time is ambivalent at best and just a spot on the right side of the calendar normally. The only really important regular day is garbage collection day. But this Saturday was a “Hallelujah” type. Decided early in the that I was not going to accept the gasket kit that did not fit and the counter sprocket that did not fit. The gasket kit was easy, Amazon easy.
The sprocket, from Parts Giant, was equally as useless due to its poor manufacturing process. I decided that its quality was just not acceptable( yes, I realize that are not the manufacturers just the retailers) but $67 is in the range of where I expect a little more than junk. The counter sprocket I was received was junk. I wrote a note to them on their site asking for an exchange and I included the fact that I had tried but fail to polish out the poor workmanship that resulted in a sprocket that was useless to me. Yes, it was “used” in the truthful sense. It was also JUNK” in the truthful sense. If it won’t fit, it’s junk. My thinking is to find and purchase( if Parts Giant doesn’t replace the faulty part) a new counter sprocket or just use the old one because at least I can get the old counter off and changed with minimal effort and cost as compared to the ill fitting one I’m trying to stuff on the shaft. It’s just a matter of what pile of sh*t I choose to shovel. Probably go ahead and stuff the clutch back in also until the gasket kit arrives next week just to get it all back in place before I lose a part on my massive work bench.
In order to make/fake some progress I reassembled the stator side using the old counter shaft sprocket but without the gasket,it’s worn, yes, but it isn’t quite junk. Got the Aux tranny installed except for the new gasket kit which I ordered from DrAtv today. Just having the parts assembled correctly was a milestone worthy of an “Amen” But it was not without its struggles. This schematic show bushing #10&11 separated by just the counter sprocket bit in fact , the High sub tranny gear goes in between them, then the splined washer. Details. Details.
IMG_2940.png
IMG_2940.png
 
Last edited:
This week parts got sent back and more arrived. The fiber clutch plates arrived early in the week and got in the oil bath for a few days. The funky counter sprocket was sent back to Parts Giant with their great cooperation and communication. I submitted pictures of the misfit and (yes, wait for it) the micrometer diameters that were the source of the problem. Full refund they say and paid the return postage. Nice.
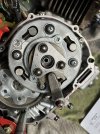
I had already assembled the clutch with the old fiber disc just for practice and to get all the parts in one place before something got lost. It was a good to do that because I found some differing ways to assemble that worked better for the real assembly later. Laid the bike over on its side and of course the last few ounces of oil had to drain out on the floor. That’s okay because I had already spent about an hour earlier in the day doing my taxes and it was going to take more than that to get any reaction from me. Then I started to reassemble and it went good.
IMG_6034.jpeg IMG_6035.jpeg IMG_6038.jpeg IMG_6037.jpeg IMG_6044.jpeg IMG_6045.jpeg
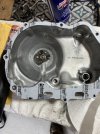
I stopped short of a full right side wrap up because I want to wait until I can crank it to check the tranny operation, do a leak test, etc. Don’t need the rear brake pedal installed for that nor several other items. The new counter sprocket I ordered from DrAtv should be here by Monday or earlier and then I can begin to wrap up the left side with the sub tranny, stator cover, reconnecting the wires from it which I may decide to remove the carb to do. It was a bit cramped with it blocking access to the wiring. Chain install will wait until all other testing is done with clutch and gears and electrical installations. Haven’t yet pulled the shocks off for inspection as I want to avoid having to wrestle a one wheeled bike and complete other tasks simultaneously, but they are next just to get the parts headed this way and maintain some inertia in the process.
 

Attachments

  • IMG_6039.jpeg
    IMG_6039.jpeg
    2.3 MB · Views: 16
  • IMG_6042.jpeg
    IMG_6042.jpeg
    2.4 MB · Views: 23
Back
Top