kirrbby
Well-Known Member
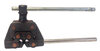
I recently bought a actual punch for that job...⅛" I think is what I bought...but it's just a common punch. I didn't know there was "roll pin punches" either. But what I've always used before is long roofing nails, with the point ground off. I lay the leg on a soft 2x4 and drive the pin INTO the 2x4 a ways. Once the pin is half out I pull the leg off of the 2x and drive the pin the rest of the way out. Works well enough.
When you go to put the pin back IN... I use a small drill bit...nail...or something, to guide the roll pin STRAIGHT toward the hole on the opposite side of the leg.
Make sure ALL of the holes are lining up... that's thru THREE separate parts. Then make sure there is a slight taper on the leading end of the roll pin...no burrs or rolled edges. Then start tapping the pin in...then put the small drill bit thru the hole in the roll pin and sticking out of the other side of the fork leg and all...then continue tapping the roll pin, using the drill bit to guide the PIN, toward and into the exit hole.
I do it this way because I've had trouble before with driving the roll pin crooked, and MISSING the exit hole...which is a big ol pain in the butt.
I try to be careful with those pipe pistons, always. I've managed to break new ones too.
Last tip...don't forget to put your new gators on before you put everything back together...lol...done that before too...like a bonehead