Splitting the cases! Advice.

MountainMini

Active Member
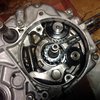
image.jpeg image.jpeg So I want to go ahead and split the cases to inspect my shift forks. LH side. I have a clymer manual as back up. But they're not always clear on things. Head, cylinder, piston, stator&backing plate and the RH crankcase cover are off. LH crankcase bolts are all loose but not out yet. Don't want to go too far and start taking things off that are unnecessary. What's my next move?
 

cjpayne

Well-Known Member
Clutch, primary gear, shift shaft, shift star screw(will need impact driver)

Get the motor entirely clean before taking apart.
Take LOTS of pictures.
I, personally, like to bag up things and put them in order as they come off.
Have all the gaskets and parts you know you need before dismantling.
Have the specialty tools, such as, handheld impact, clutch nut tool, and flywheel remover.
Parts cleaner(shop towels and rags will leave lint on the parts and eventually build up in the oil screen). I typically use brakeclean and electrical contact cleaner(for the painted parts).
Oil dispenser for lubing parts after cleaning.

All I can think of for right now.lol
 
Last edited:

kirrbby

Well-Known Member
X2^^^
You are splitting the cases, but actually you are rebuilding your engine. To do that properly, pretty much everything needs to come off/out.

Your left side is pretty much ready after you remove the rubber plug and the m6 bolt that's under there...keep that bolt and washer together, with the shift drum. It's a special bolt and washer.

Your right side needs the clutch, primary gears, kickshaft spring and retainer all removed. Then the shift star and detent arm removed. Then the shift shaft needs to be pulled out of there.

THEN, if all of the case screws are out, you're ready to split.
 

MountainMini

Active Member
Ok thanks. Been taking lots of pictures. Don't have the clutch nut tool. Will order. Have all the other tools. Will order a gasket kit. Have a seal kit. Will be replacing all seals too. Definately, I have been bagging and labelling everything for reassembly.
 

69ST

Well-Known Member
One big caveat that hasn't been mentioned...pay attention to the thrust washers on both transmission shafts and the kickstarter. They tend to stick to the RH case half, then drop off later...leaving you to figure out where they came from. Best to ID & bag them with their sub-assemblies, as you proceed...less to remember come assembly time.
 

cjpayne

Well-Known Member
There is a springloaded lever with a little wheel on it that rides against the shift star grooves. Try not to bend it in and out, as its mount can break. Seen that a time or two.
 

MountainMini

Active Member
image.jpeg image.jpeg image.jpeg image.jpeg image.jpeg image.jpeg image.jpeg image.jpeg image.jpeg image.jpeg
Ok they're split. Every thing is out. I took lots of pictures. I watched kirrbbys' 3 part you tube video which really helped a lot. Thanks Kirrbby! Nothing for metal shavings in there. A little grungy but I'll clean all that up. What do you guys think of the shift forks???
 

69ST

Well-Known Member
Maybe post one showing the clutch, with the oil spinner cover/throwout bearing flange removed.

What I've seen, so far, is about as expected...more dirt/sludge than you want, but not "OMG" horrible or anything like that.

The one piece I'd replace is that shift fork with galling on the contact pads. I can guarantee that it's still well within wear limits. However, $45 buys a minty-new, OEM replacement...that still has full thickness of that all-important heat-treated "layer". IMHO, that's cheap insurance at the minimum and a the kind of extra little grace note that separates a good rebuild from a perfectionist one. R&R-ing a shift fork, from this level of dis-assembly, is an easy 2-minute job.

Next up, check rod clearance, at the big end (you want less than 0.018", ideally 0.014" or less), along with radial runout. Insert the wrist pin in the small end. It should fit snugly and have no play that can be felt by hand. Based on what I've seen so far, I expect the crank is still in very good condition and the inspection will turn out to have been for peace-of-mind.

Looks to me like you're well on your way to an excellent result.(y)
 

cjpayne

Well-Known Member
Might as well rebuild the clutch. The main "big" springs, on the inside, probably need to be changed too. After 40plus years, they can lose their tension. I've run into a few that were slipping and that was the cause.
 

69ST

Well-Known Member
If that's how it was when you first removed the cover, then that's the cleanest oil spinner I've ever seen, with more than 500 miles on the engine. This is another good sign..:)
 

kirrbby

Well-Known Member
Everything looks pretty dang good to me. The spinner is clean, no smily's on the shift forks...is rare at my house, gears look great. I'll have to look back to remember if you knew any history on this engine, and if it's ran for you yet. Looks really good from here tho.
 

MountainMini

Active Member
I’m as deep as you can get into this engine. So I’ll just order both shift forks, pins and clips. Haven’t really cleaned the spinner, no brake Kleen or anything. Pretty sure somebody was before me. Old CT pointed out that it had a couple of wrong screws on it before I opened it. Plus the lock washer had been used from the looks of it. I’ll do some precision measurements on stuff soon.

No history at all on the engine. I’ve never had it running.

Clutch rebuild is on the list too.
 

69ST

Well-Known Member
If you decide to replace the shift forks, in pursuit of perfection, I'd still retain the originals. The one looks almost perfect, the other marginally usable...never hurts to have spare parts, especially engine parts...in your bike stash.
 

OLD CT

Well-Known Member
I would spray the crank/bearings good with brakleen, be sure to use the little red straw to spray in the hole under the bronze bushing. Dry with compressed air, then spray some wd40 on it and ziplock bag it to keep airbourne dust and lint off the parts. The same deal with all the other parts. For the cases, I clean/dry them and lightly lube the bearing races only with a little oil and tightly bag em. You would be amazed how much crap in the air lands on the parts if left on the bench un bagged. Use a 13 gallon kitchen garbage bag to cover the engine when you take breaks between building it. Cloth or towels should be avoided to cover it.
 
Top